Mastering Remote Web-Based SSH To Securely Access IoT Devices Server
Imagine this: you're chilling at home, sipping on your favorite coffee, and suddenly you need to check the status of your IoT devices running on a remote server miles away. What do you do? Panic? Nope. You simply whip out your laptop, open your browser, and use remote web-based SSH to connect. It's like having a superpower in your pocket!
Now, before we dive deep into the magical world of remote web-based SSH, let's break it down. If you're into tech, IoT, or anything remotely related to server management, you've probably heard about SSH. It stands for Secure Shell, and it's your best friend when it comes to securely accessing remote servers. But what happens when you don't have a fancy SSH client installed on your device? That's where web-based SSH comes in. It's like a lifesaver in the middle of the tech ocean.
In this article, we're going to explore how to use remote web-based SSH to access IoT devices servers. We'll cover everything from the basics to the advanced tricks that'll make you feel like a tech wizard. So grab your favorite snack, sit back, and let's get started!
- Who Is Aishah Hasnies Husband Discovering The Love Story Behind The Spotlight
- Hdhub4u Hd Your Ultimate Destination For Highquality Entertainment
Table of Contents
- What is Remote Web-Based SSH?
- Why Use Web-Based SSH?
- Setting Up Web-Based SSH
- Tools for Web-Based SSH
- Connecting to IoT Devices
- Security Best Practices
- Troubleshooting Tips
- Benefits of Remote Access
- Common Challenges
- Conclusion and Next Steps
What is Remote Web-Based SSH?
Let's start with the basics. Remote web-based SSH is a method that allows you to connect to a remote server using a web browser instead of a traditional SSH client. It's like giving your browser superpowers to handle secure connections without needing any extra software. Think of it as a bridge between your device and the server, ensuring that your data stays safe and sound.
How Does Web-Based SSH Work?
Here's the deal: when you use web-based SSH, you're essentially using a web application that acts as a middleman between your browser and the server. This application encrypts your data, sends it securely over the internet, and then decrypts it on the server side. It's all about keeping things secure and easy to access.
Some popular tools for web-based SSH include WebSSH, AjaxTerm, and GateOne. These tools are designed to make your life easier by providing a user-friendly interface that even a tech newbie can navigate.
Why Use Web-Based SSH?
Now that we know what web-based SSH is, let's talk about why you'd want to use it. There are plenty of reasons, but here are a few key ones:
- Convenience: You don't need to install any extra software. Just open your browser and go.
- Accessibility: You can access your server from anywhere, as long as you have an internet connection.
- Security: Web-based SSH uses encryption to keep your data safe from prying eyes.
- Cost-Effective: No need to spend money on expensive SSH clients or hardware.
Let's face it, in today's fast-paced world, convenience is king. And web-based SSH delivers that convenience without sacrificing security or functionality.
Setting Up Web-Based SSH
Setting up web-based SSH might sound intimidating, but it's actually pretty straightforward. Here's a step-by-step guide to help you get started:
Step 1: Choose the Right Tool
First things first, you need to choose a tool that fits your needs. Some popular options include:
- WebSSH
- AjaxTerm
- GateOne
Each tool has its own set of features and requirements, so make sure to do your research before making a decision.
Step 2: Install the Tool
Once you've chosen your tool, it's time to install it. Most tools come with detailed installation instructions, so follow those closely. If you're using a Linux server, you might need to use the terminal to install the tool. Don't worry, it's not as scary as it sounds!
Step 3: Configure the Tool
After installation, you'll need to configure the tool to work with your server. This usually involves setting up user accounts, configuring security settings, and testing the connection. Make sure to follow best practices to ensure maximum security.
Tools for Web-Based SSH
Now that we've covered the basics of setting up web-based SSH, let's take a closer look at some of the tools you can use:
WebSSH
WebSSH is a simple and lightweight tool that allows you to connect to SSH servers directly from your browser. It's easy to use and doesn't require any installation on the client side. Just point your browser to the WebSSH server, and you're good to go.
AjaxTerm
AjaxTerm is another popular option for web-based SSH. It's a bit more advanced than WebSSH, but it offers more features and customization options. If you're looking for something with a bit more power, AjaxTerm might be the way to go.
GateOne
GateOne is a more robust solution that offers enterprise-level features. It's great for large organizations that need to manage multiple servers and users. If you're dealing with a complex setup, GateOne might be worth considering.
Connecting to IoT Devices
Now that you've got your web-based SSH setup, it's time to connect to your IoT devices. Here's how you can do it:
Step 1: Identify Your IoT Devices
Before you can connect, you need to know which devices you're dealing with. Make a list of all your IoT devices and their IP addresses. This will make the connection process much easier.
Step 2: Configure SSH Access
Once you've identified your devices, you'll need to configure SSH access. This usually involves setting up user accounts, configuring firewalls, and testing the connection. Again, make sure to follow best practices to ensure maximum security.
Step 3: Connect Using Web-Based SSH
Finally, it's time to connect. Open your web-based SSH tool, enter the IP address of your IoT device, and log in using your credentials. Voila! You're now connected to your IoT device from anywhere in the world.
Security Best Practices
Security is key when it comes to remote web-based SSH. Here are a few best practices to keep in mind:
- Use Strong Passwords: Make sure to use strong, unique passwords for all your accounts.
- Enable Two-Factor Authentication: This adds an extra layer of security to your login process.
- Keep Software Up-to-Date: Regularly update your SSH tools and server software to patch any security vulnerabilities.
- Monitor Access Logs: Keep an eye on your access logs to detect any suspicious activity.
By following these best practices, you can ensure that your web-based SSH setup is as secure as possible.
Troubleshooting Tips
Even with the best setup, things can go wrong. Here are a few troubleshooting tips to help you out:
- Check Your Internet Connection: Make sure you have a stable internet connection before trying to connect.
- Verify IP Addresses: Double-check that you're using the correct IP address for your device.
- Test Firewall Settings: Ensure that your firewall is configured to allow SSH connections.
- Consult Documentation: If all else fails, consult the documentation for your SSH tool or server.
Remember, troubleshooting is all about patience and persistence. Keep trying until you find the solution.
Benefits of Remote Access
Remote access offers a ton of benefits, especially when it comes to managing IoT devices. Here are a few key advantages:
- Flexibility: You can access your devices from anywhere, anytime.
- Efficiency: You can manage multiple devices without needing to be physically present.
- Cost Savings: You don't need to invest in expensive hardware or travel expenses.
- Scalability: You can easily scale your setup to accommodate more devices and users.
With remote access, the possibilities are endless. Whether you're managing a few devices or an entire network, web-based SSH can help you stay in control.
Common Challenges
Of course, no technology is perfect, and web-based SSH is no exception. Here are a few common challenges you might face:
- Security Risks: If not properly configured, web-based SSH can expose your devices to security threats.
- Performance Issues: Depending on your internet connection, you might experience lag or slow performance.
- Compatibility Problems: Some tools might not work well with certain browsers or devices.
The key to overcoming these challenges is to stay informed and proactive. Regularly update your tools, follow best practices, and don't be afraid to ask for help when you need it.
Conclusion and Next Steps
And there you have it, folks! We've covered everything you need to know about using remote web-based SSH to access IoT devices servers. From the basics to the advanced tricks, you're now equipped with the knowledge to take your server management game to the next level.
Remember, the key to success is practice and persistence. Keep experimenting with different tools and techniques until you find what works best for you. And don't forget to stay secure and follow best practices to protect your devices and data.
So, what are you waiting for? Go out there and start connecting to your IoT devices like a pro. And if you found this article helpful, don't forget to share it with your friends and colleagues. Together, let's make the world of tech a little bit easier to navigate!
- Why Ullu Web Is The Ultimate Destination For Bingewatching
- Sadie Mckenna Nude The Truth Behind The Controversy And What You Need To Know

Sensors Free FullText An IoTBased Smart Home Automation System
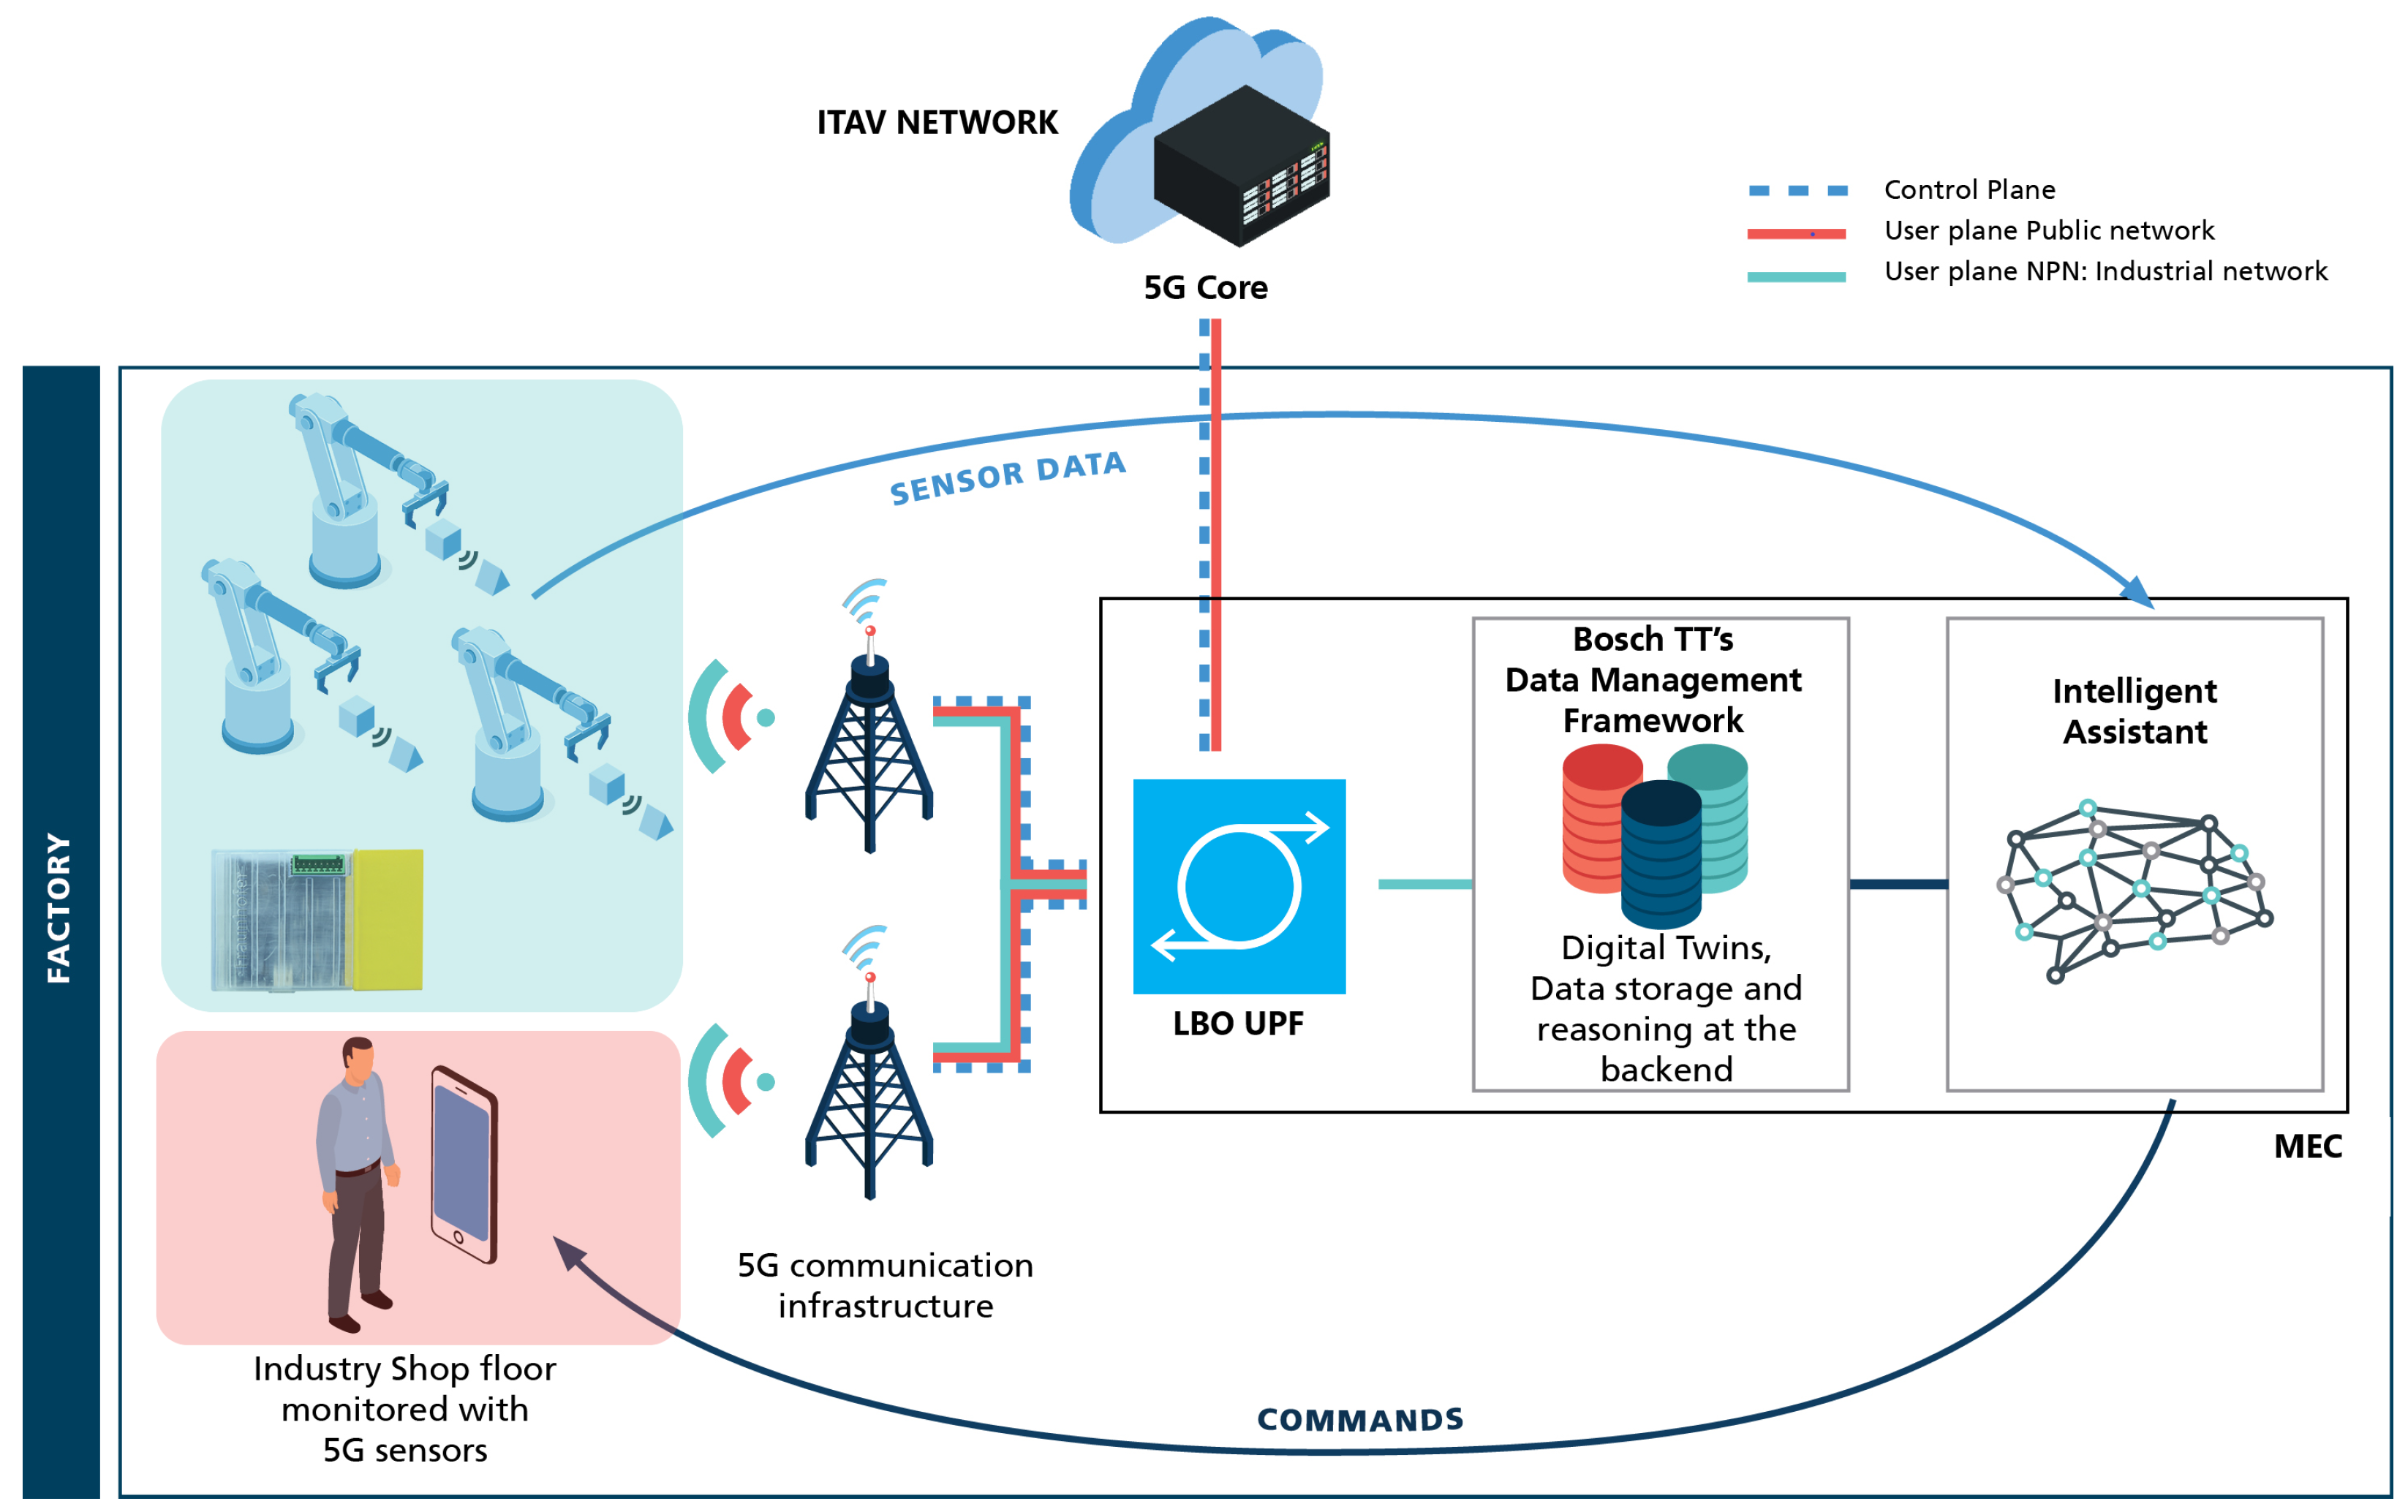
Sensors Free FullText Industrial of Things over 5G A
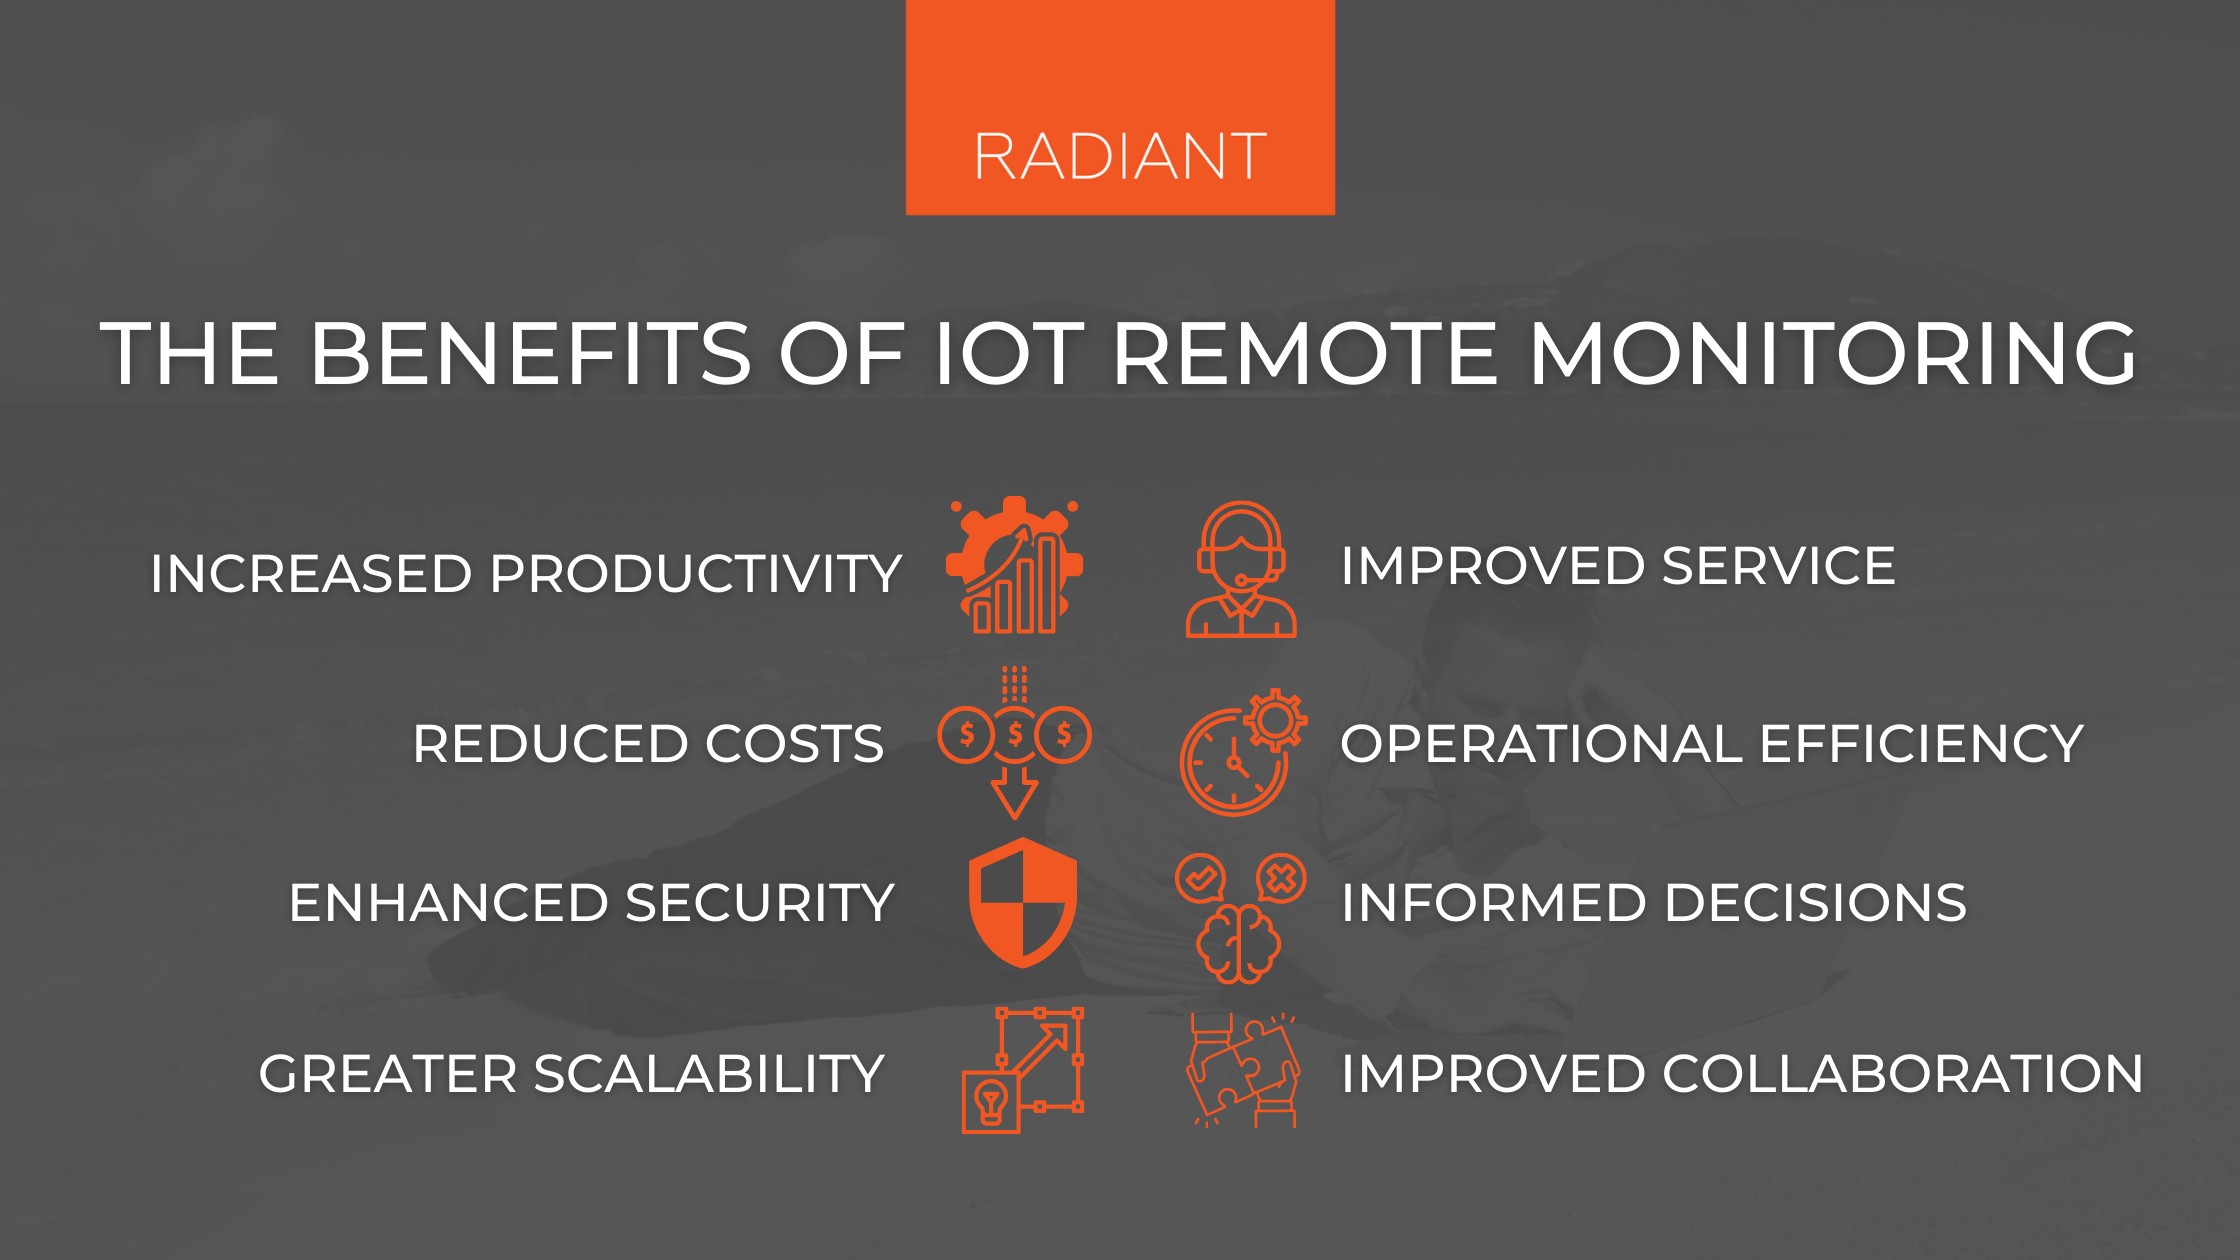
IoT Remote Monitoring What Is IoT Remote Monitoring Radiant
